February 2, 2025

I write this as our Kleptocrat In Chief has just sparked a trade war with our three largest trading partners for no particular reason. Which means, among many other horrible things, that bicycles and new bike parts are likely to become much more expensive in the near future.
Thankfully, many bike parts basically last forever, especially older ones with fewer plastic pieces. Sure, brake pads, tires, cables, and so forth wear out pretty quick. And parts with bearings like headsets, hubs, and bottom brackets will get pitted after thousands of miles. But things like brakes, derailleurs, and even pedals will last a very long time with just a little maintenance. In fact, many parts were designed to be taken apart and rebuilt periodically. If you're reading this in the near future and contemplating sticky brakes or a worn derailleur, I hope you'll find this post useful.
Fixing components is something I've gotten better at. I remember trying to rebuild the v-brakes on my commuter bike back in the 90s and never quite understanding how to get them aligned and balanced. And I remember trying to fix an errant derailleur by cranking on the limit screws, as if that would somehow improve shifting. The internet has made figuring these things out a lot easier. My favorite resources are:
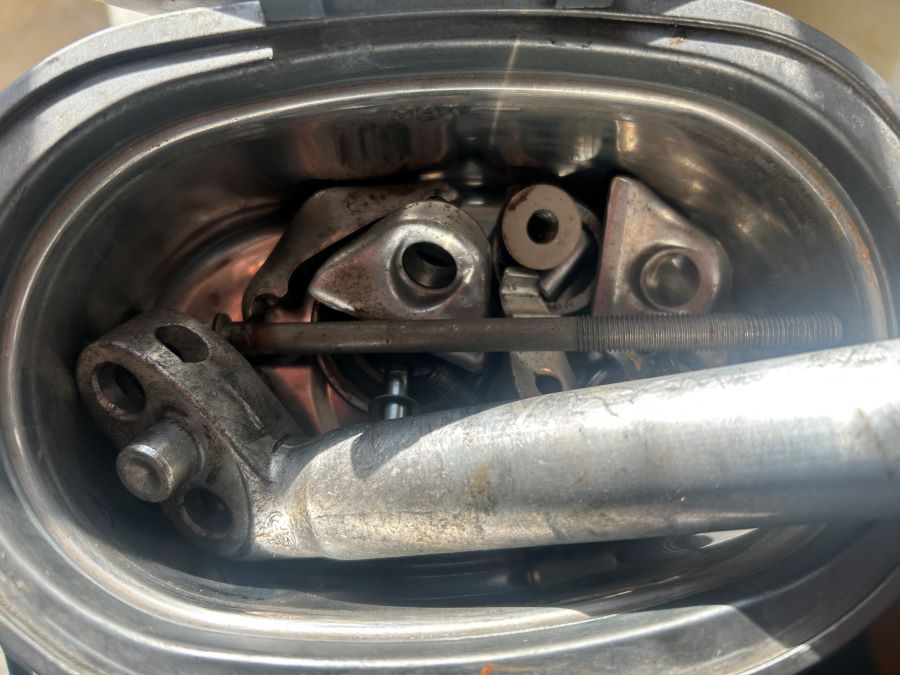 What I've learned basically boils down to two simple ideas: clean and lubricate. And the best way to do that is to take everything completely apart. Once that's done, I give them a bath in a small ultrasonic jewelry cleaner (above) that Millie found cheap at Goodwill. I use a solution of hot water, white vinegar, and Dawn dish soap. It works like magic.
Many components are simple enough to disassemble. Stems and seatposts, for example, just require removing some nuts and bolts. Brakes are fairly easy, too, because you can usually see the spring and understand how they work at a glance.
Derailleurs, however, are another matter. Each one is built different and every model seems to employ different tricks that aren't easily figured out. Most derailleurs have a small removable bolt that keeps the chain tension spring tight. Removing that bolt allows you to open up and rebuild the spring assembly. This process is obvious with some derailleurs, but I rely on Retro Rebuilds to learn each model's tricks.
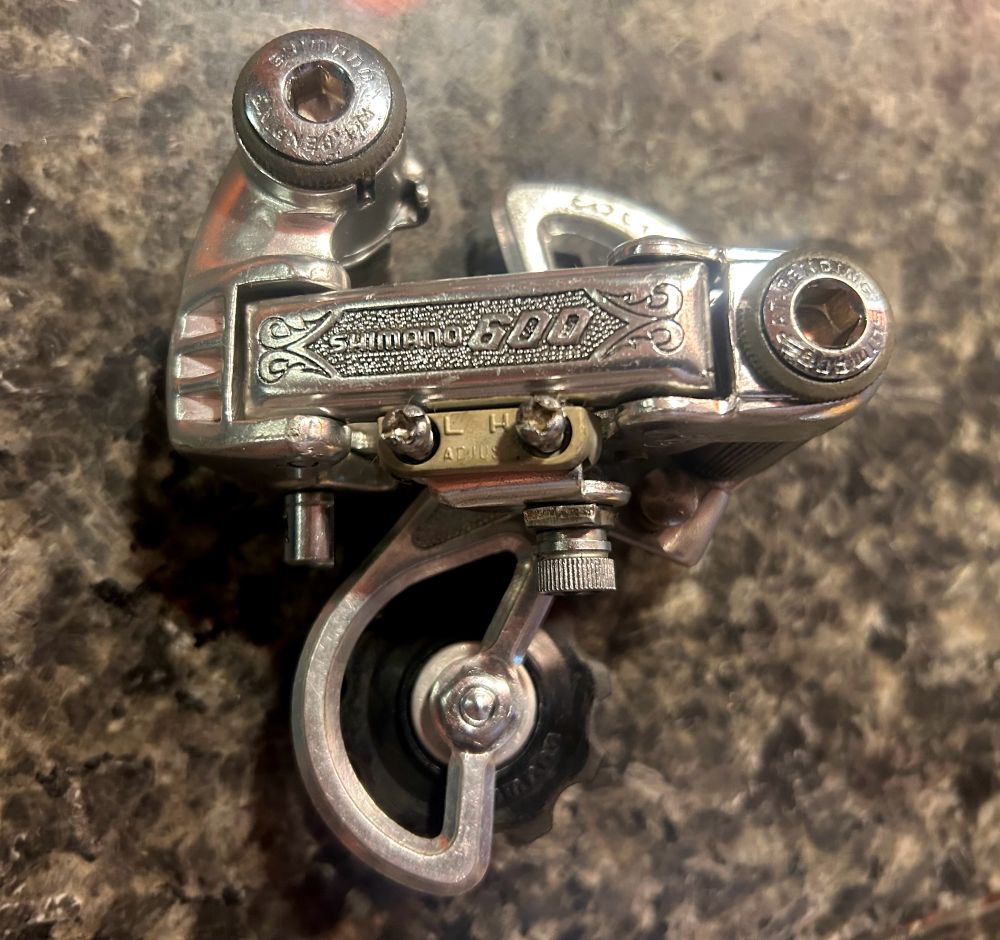
This Shimano 600 Arabesque mech was seized before I rebuilt it. Gunk and rust made it inoperable but a good cleaning and lubrication was all it needed.
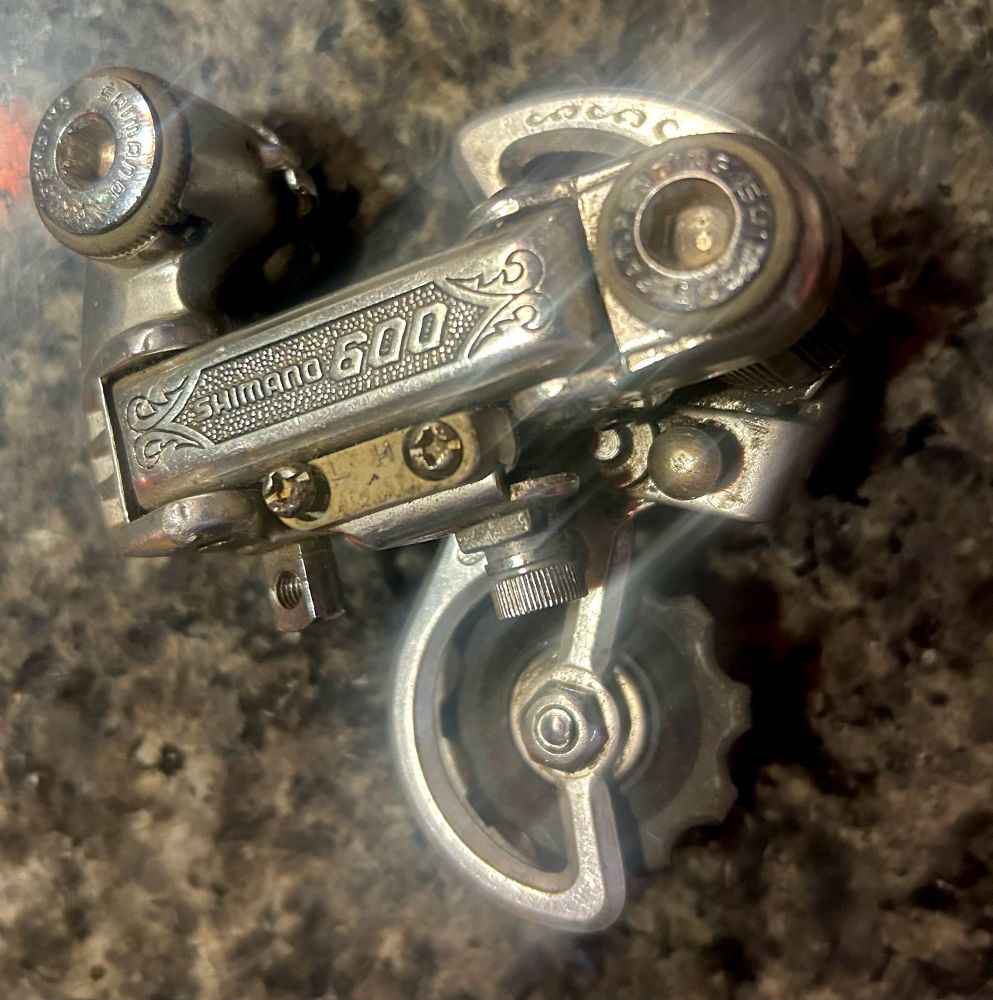
Shimano 600 Arabesque Derailleur before cleaning |
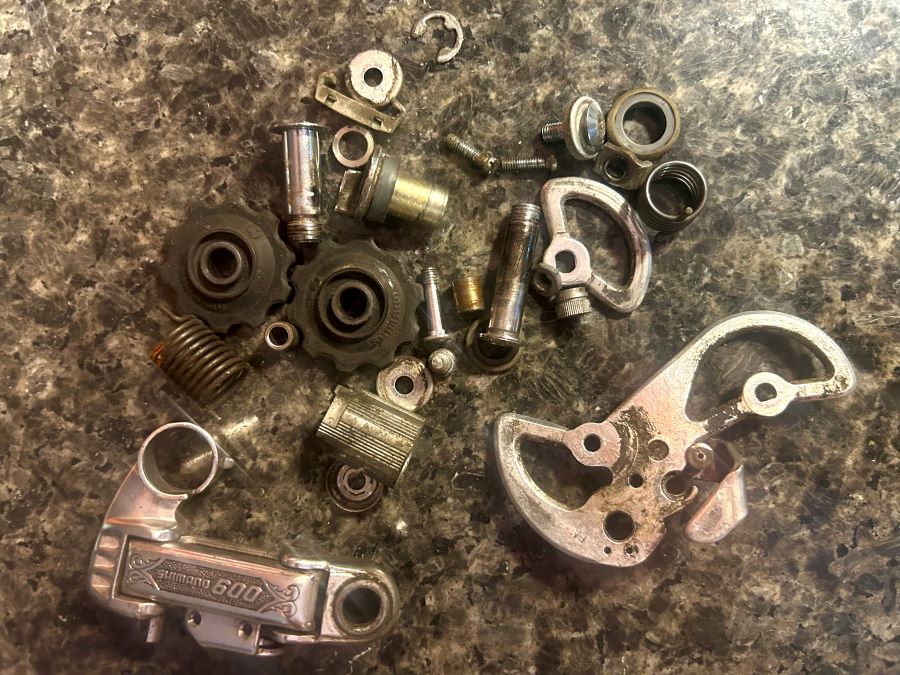
All the disassembled pieces before cleaning |
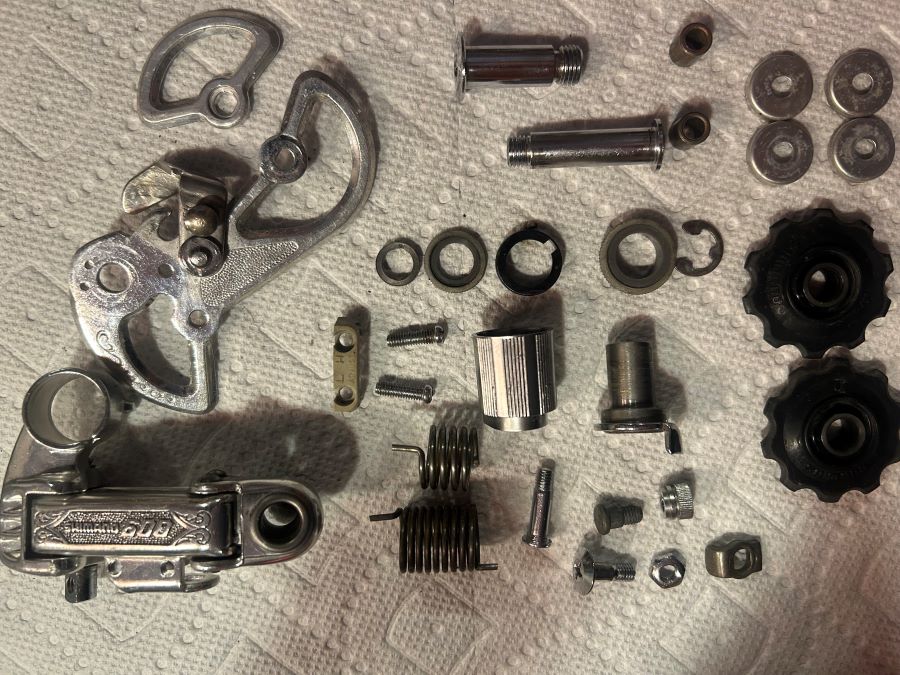
The pieces after an ultrasonic cleaning |
The clean and reassembled derailleur |
It's important to know that different parts require different types of lubrication. The two spring assemblies, for example, require a medium duty grease. I use marine grease, which holds up better in wet conditions. For the little axles of the jockey pulleys, I use just a little bit of lightweight white lithium grease. A little chain oil in the knuckles of the parallelogram also helps. Also, be sure to apply a little bit of grease to the threads of every bolt.
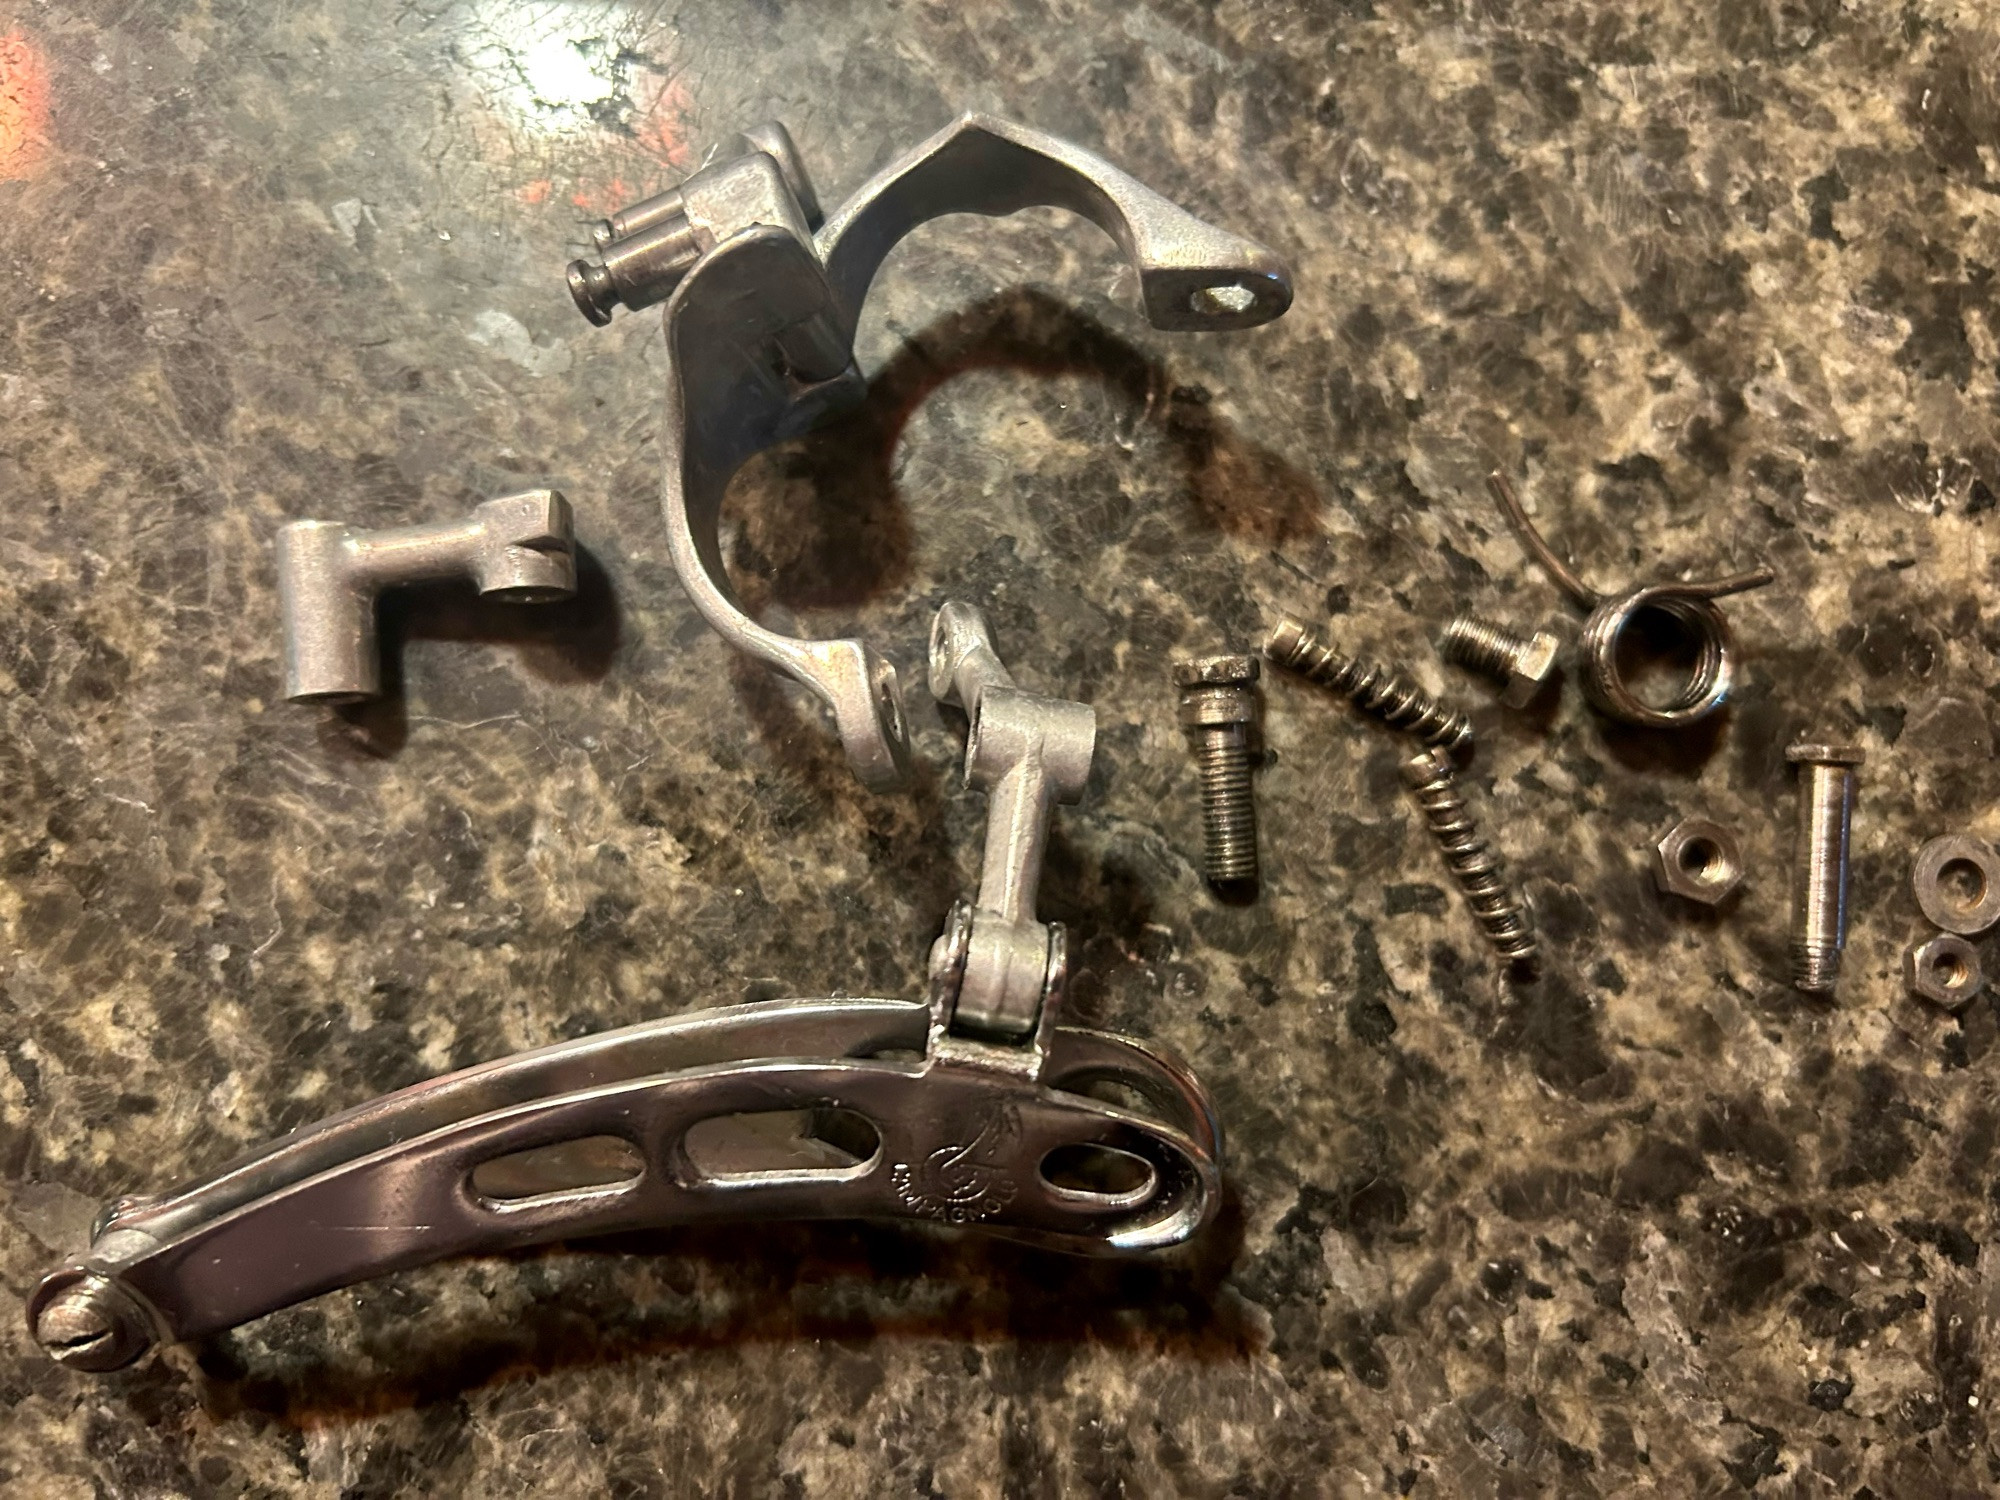
Front derailleurs are more difficult to disassemble but also less likely to seize. Many are riveted and more or less unserviceable but some, like this Campagnolo Nuovo Record, use spring clips that allow disassembly. In any case, front derailleurs are relatively simple devices and usually it's enough to clean them and apply a bit of oil to their pivots.
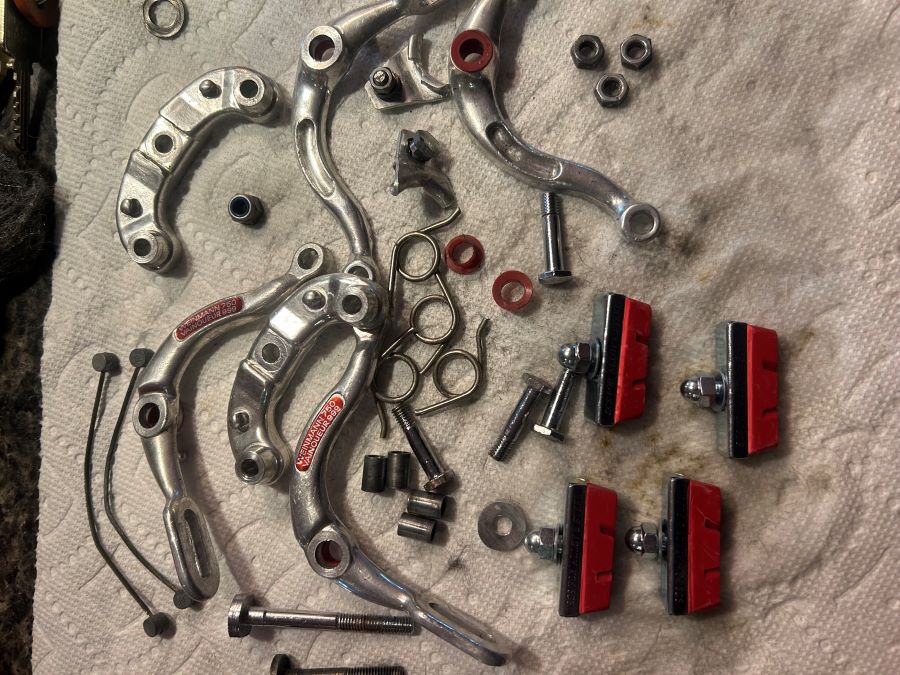 Brakes are also pretty simple devices and a good cleaning will work wonders. These 1970s Weinmann Vainqueur centerpull calipers cleaned up beautifully. Brakes have one or two very strong springs, so be careful when taking them apart or they'll bite. I use a little bit of white lithium grease on the pivots--they don't need anything else. Modern dual pivot brakes work a little different, but they're just as easy to disassemble and clean. In most cases, you'll also want to install a new set of pads.
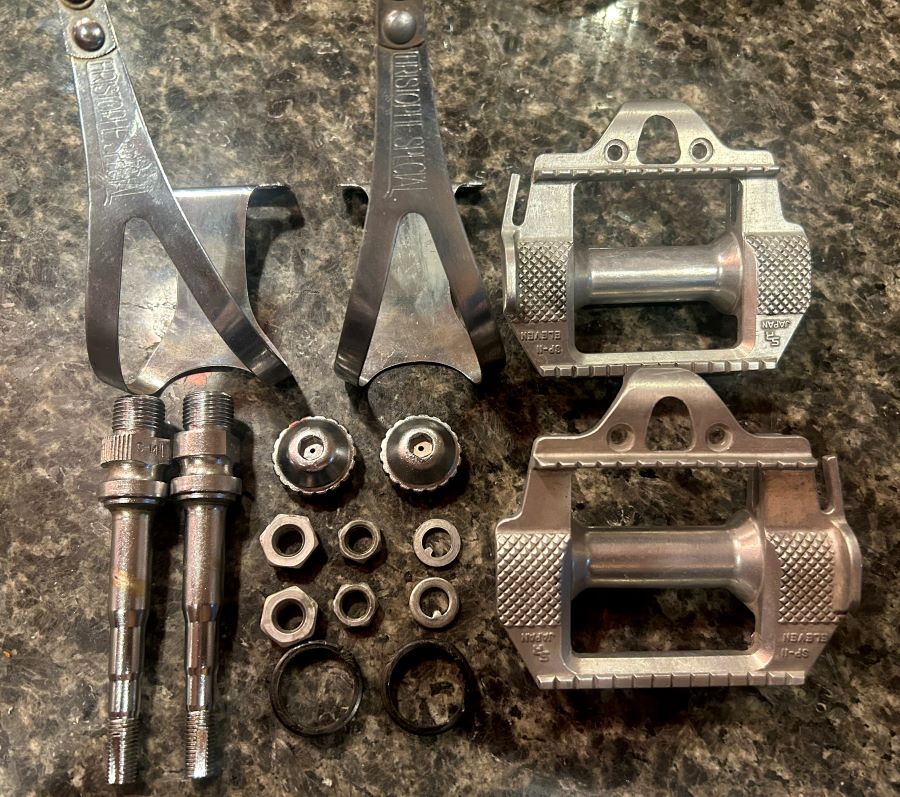 Pedals are probably the most abused component of any bike, especially on mountain bikes. A few dozen tiny steel bearings bear the full force of a rider's weight and all their muscle energy. And, they're always smashing into things like curbs, rocks, and shins. Often, pedal cages get completely smashed and can't be saved. But just as often, a pedal develops a stiffness, a squeak, or an annoying grinding vibration that can usually be fixed.
Most pedals have a removable dust cap that threads off to reveal its bearings and axle. These are held in place by two nuts and a washer, which are fairly easy to remove. Once removed, it's helpful to count the bearings before pulling the axle out. I use Park Tool's Bearing and Spoke Gauge to figure out what size the bearings are. You'll need to buy new bearings at your local bike shop or order them online. They're cheap.
Once the pedal is disassembled, just give everything a good cleaning then carefully repack new bearings and grease into each side of the pedal. The only trick is to tighten the inner nut (also called the cone nut) just enough so that the pedal spins freely with no play in the axle. Then reinstall the washer, lock nut, and dustcap. That's it! Be sure to grease the pedal threads before reinstalling them on the crank.
 |
 |
Finally, both aluminum and steel parts will corrode over time. Rust on steel can be cleaned up with a rust dissolver like Naval Jelly, which is an acid that removes and hardens oxidized iron. If chromed parts have rust parts, give them a good scrubbing with aluminum foil--it works wonders.
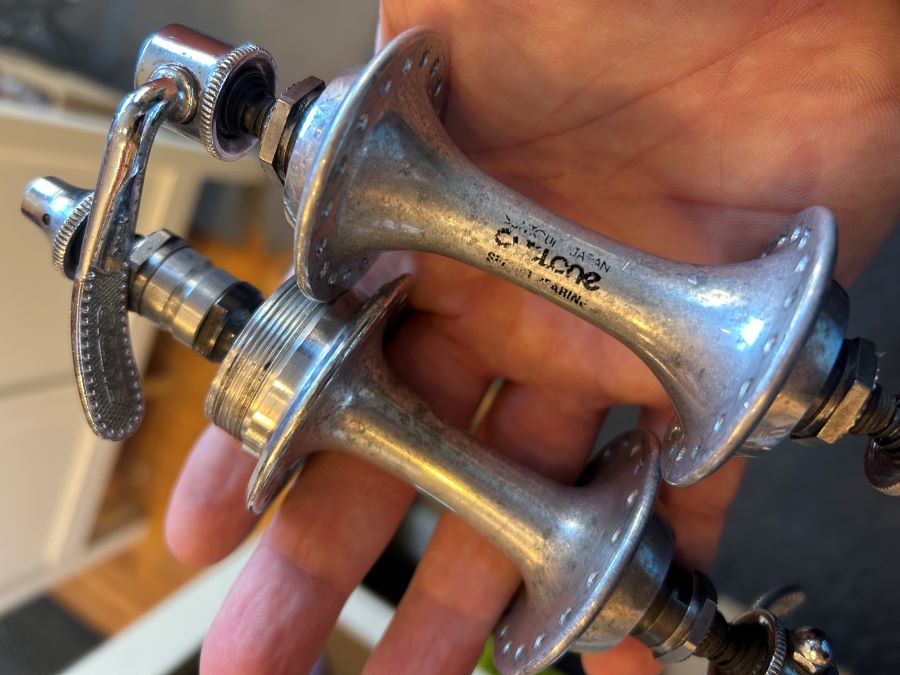
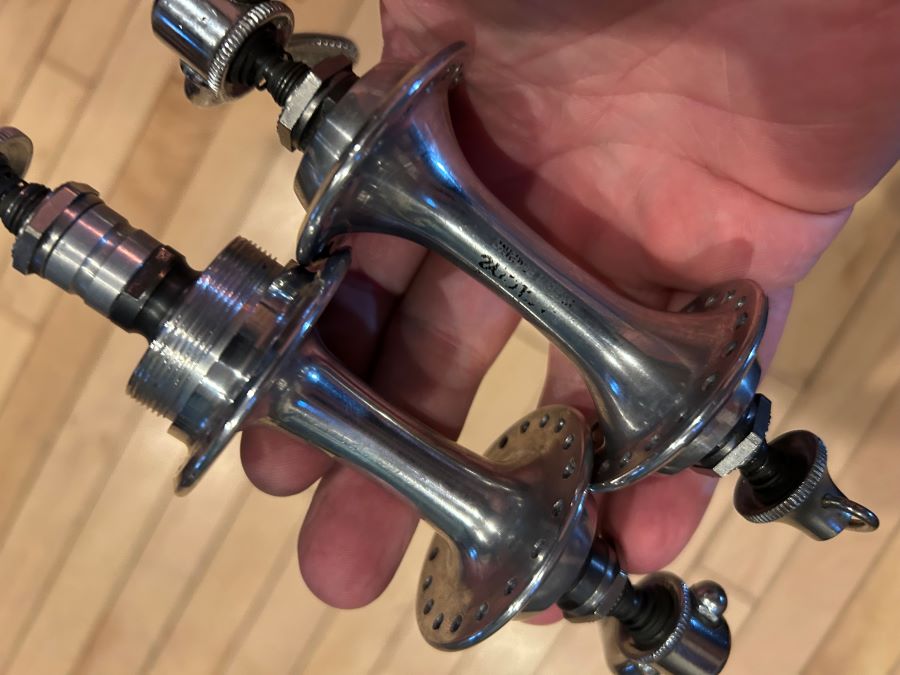
Aluminum parts, like the Suntour Cyclone hubs above, clean up beautifully with a bit of scrubbing with fine steel wool and a quality metal polish. Shiny = good!
I hope this post will be encourage you to think a little differently about a malfunctioning component. Instead of buying a new part, consider taking the old part apart. Clean it. Lubricate it. See if you can put it back together again. Maybe you'll just end up with a malfunctioning part in pieces. Or maybe you'll have a repaired component, good as new.