Originally Published February 23, 2026
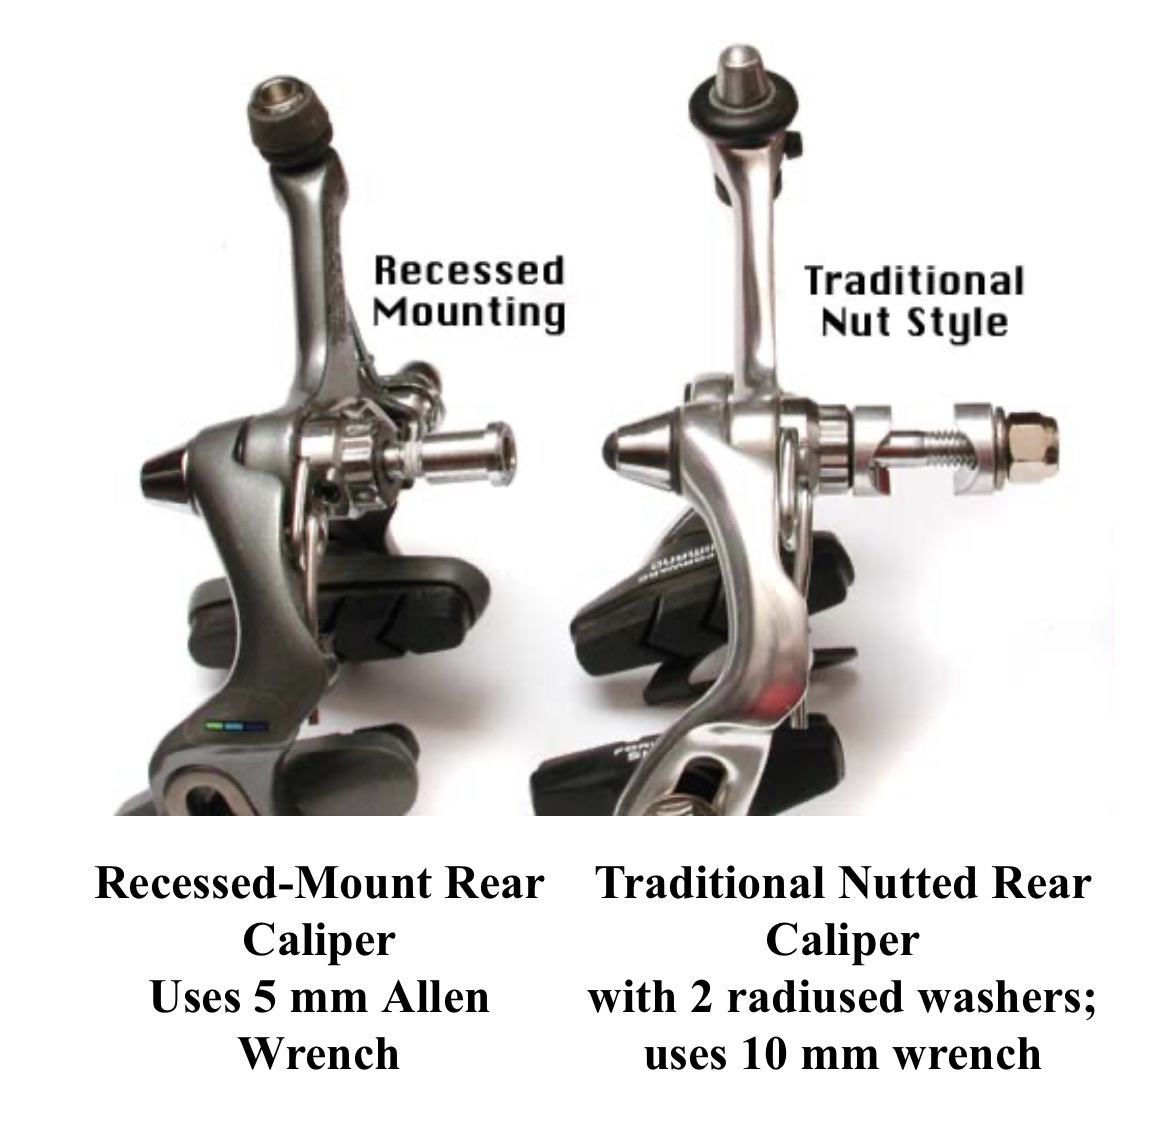
Nutted vs recessed brakes (illustration from Sheldon Brown)
Brakes are one of the many challenges with vintage steel bikes. Prior to the early 1980s, bike frames were built for nutted brakes, where the attachment bolt is longer and is held to the frame with a nut behind the fork crown or rear brake bridge.
Nutted brakes came in two styles: centerpull (as on my Motobecane Grand Record) or sidepull. Back then, centerpull brakes were considered somewhat old fashioned, but they perform great. They're somewhat fussy to install, but I have several bikes with low end fifty year old centerpulls that work just as well as any modern brake.
Single pivot sidepulls, on the other hand, are a pain in the ass. Cheap ones are flexy as hell and even expensive sidepulls are weak and nearly impossible to center. Sooner or later, they'll rotate out of alignment and rub against the wheel rim.
Suffice it to say, I can't abide vintage sidepull brakes. I know some purists will disagree, but I really like my bike to stop when I ask it to stop.
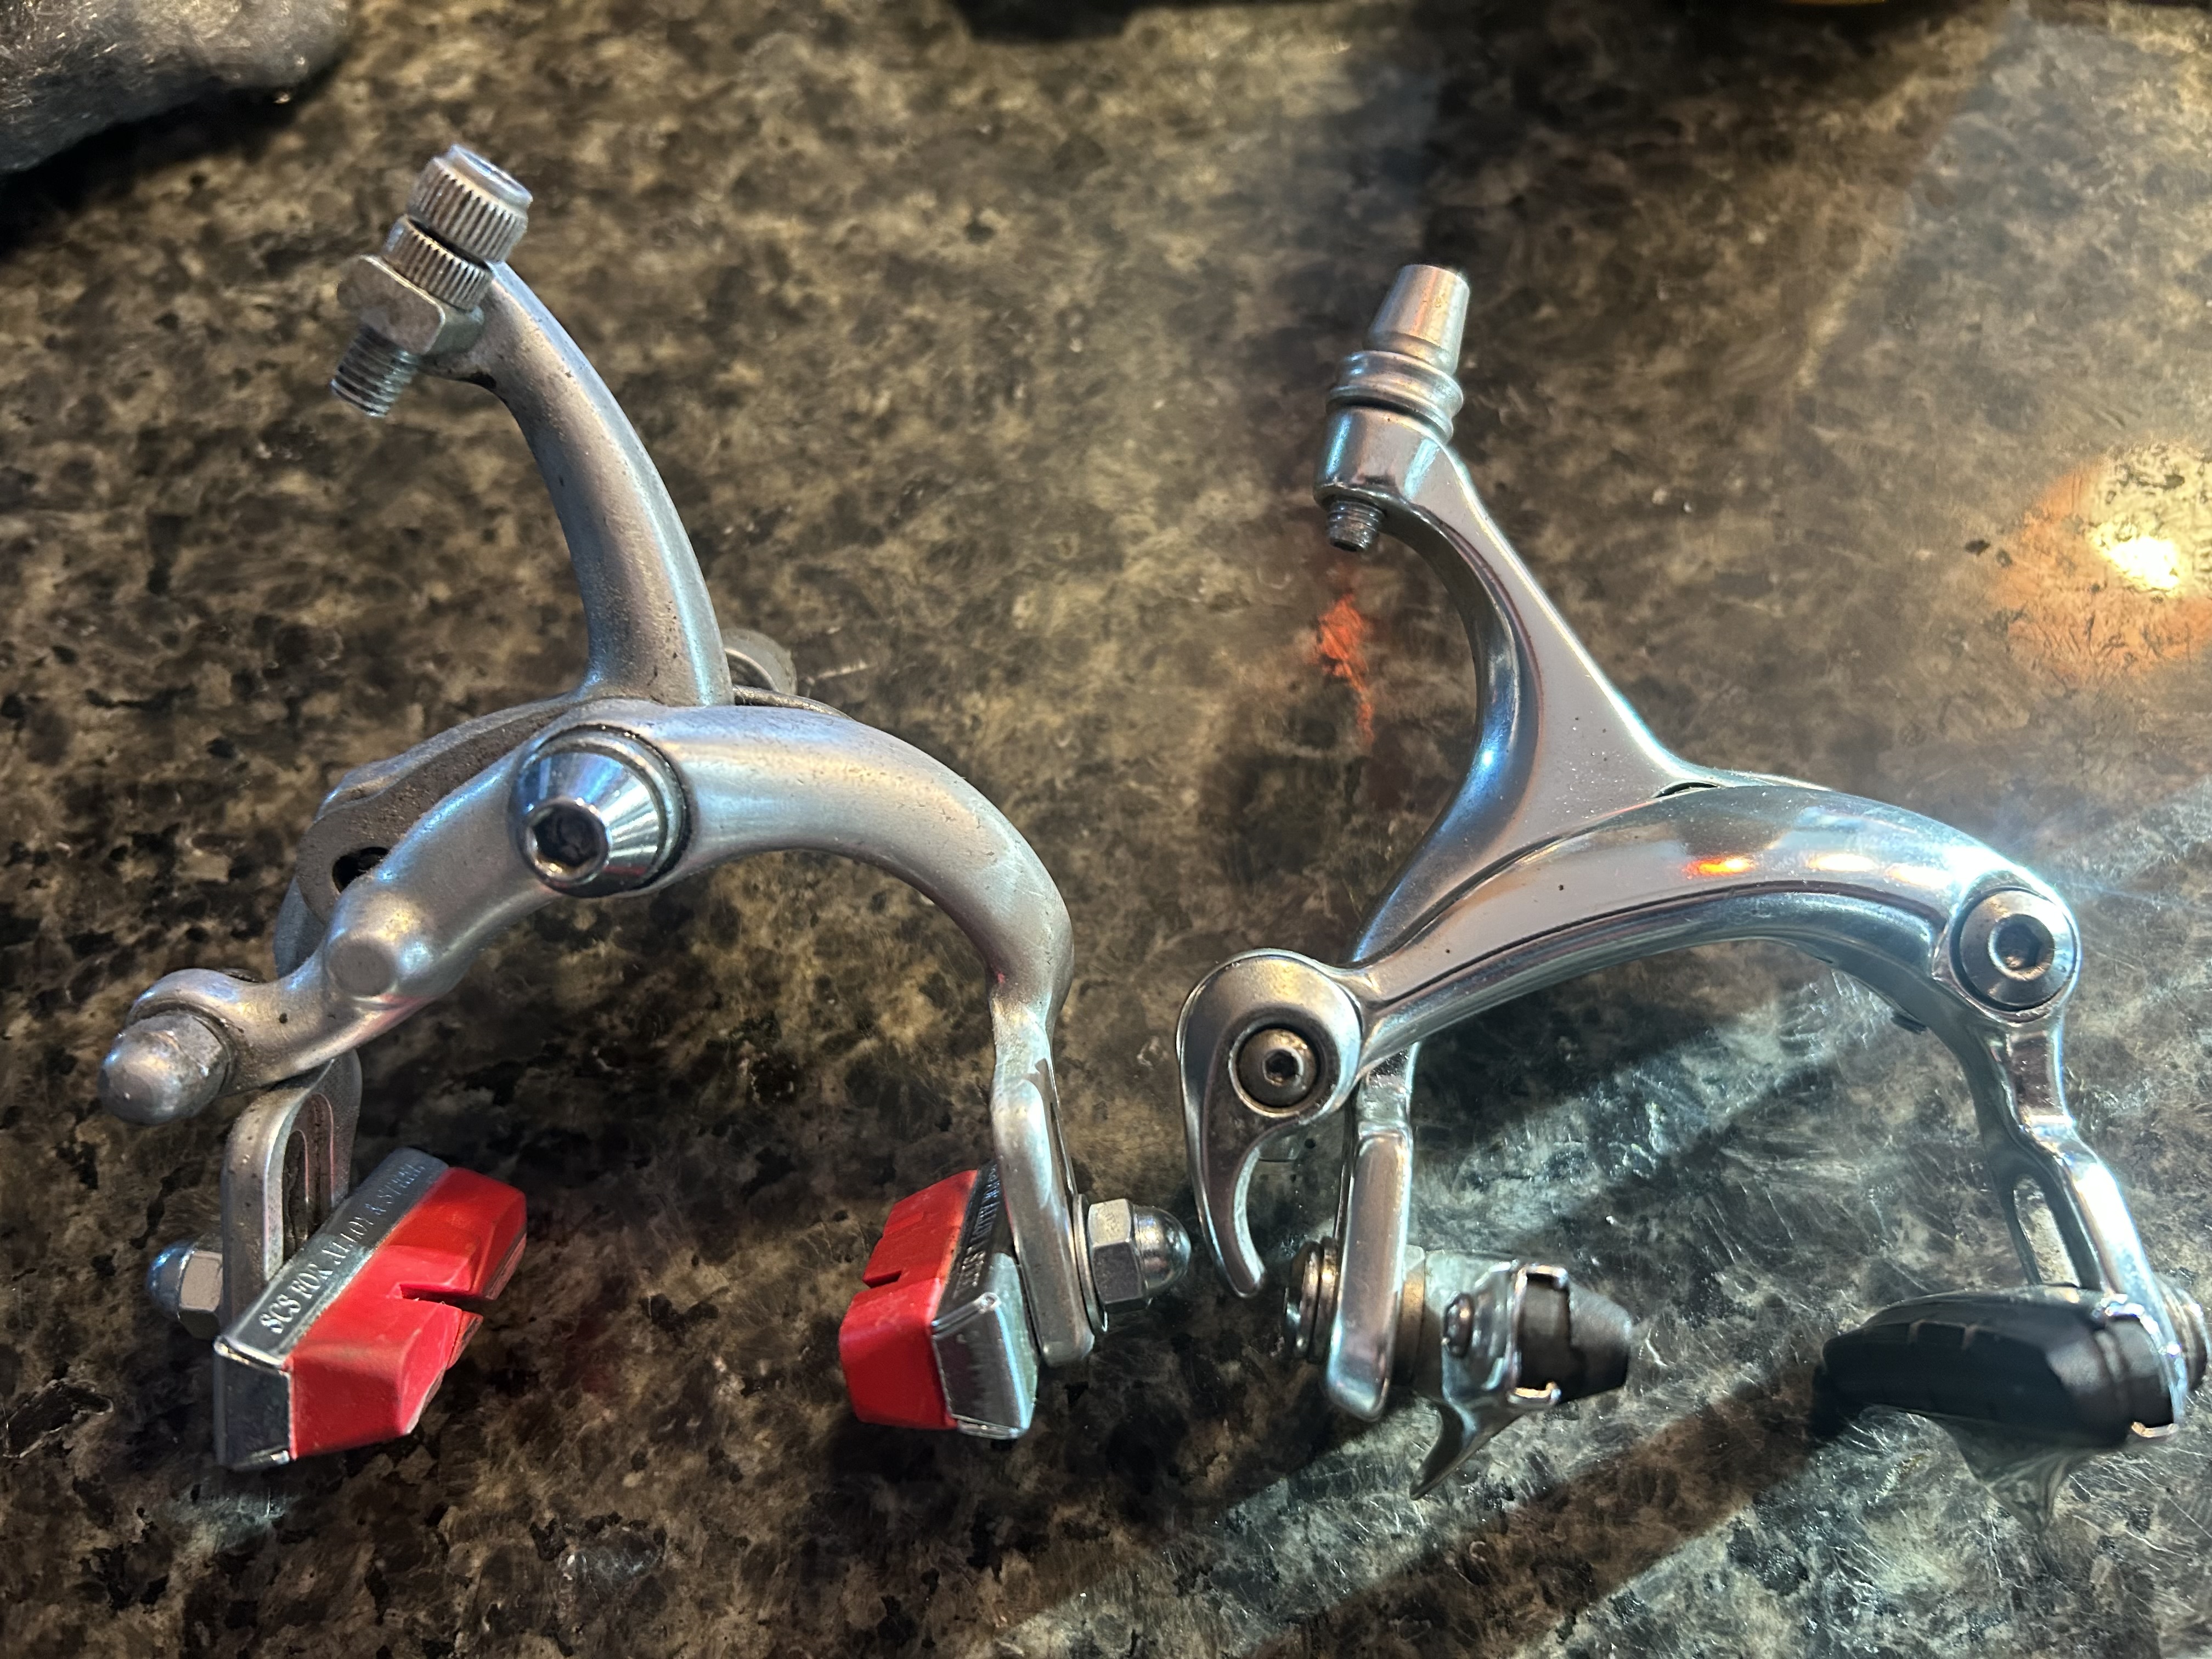
Sidepull brake (left) and a modern dual pivot brake (right)
Dual pivot brakes, on the other hand, are stronger, more adjustable, and will almost never rub against the rim. Even the cheapest modern dual pivot brakes will perform better then the most expensive vintage sidepulls.
Unfortunately, almost all dual pivot brakes use recessed nuts which aren't easily compatible with a vintage bike frame.
It's a problem with three possible solutions:
1. Buy some Tektro nutted calipers if you can find them and can afford them. They're a bit pricey and hard to find, but they're an easy (if somewhat inelegant) solution. I usually buy used calipers at one of our many local used bike parts stores at a fraction of the cost of a pair of new Tektros.
2. Drill out the hole in the back of the fork crown to 8mm in order accomodate a recessed nut. Sheldon Brown does a good job describing the process. Don't bother drilling the rear brake bridge, though--just get two front brake calipers instead of a front and a rear. A modern front caliper will easily mount to the rear bridge of a vintage bike.
This second method only works if you've got a beefy fork crown with enough steel to accomodate a larger hole. Higher end steel bikes, however, often have more supple crowns, as is the case with the 1974 Raleigh Professional I'm currently restoring. I don't want to make that hole any bigger!
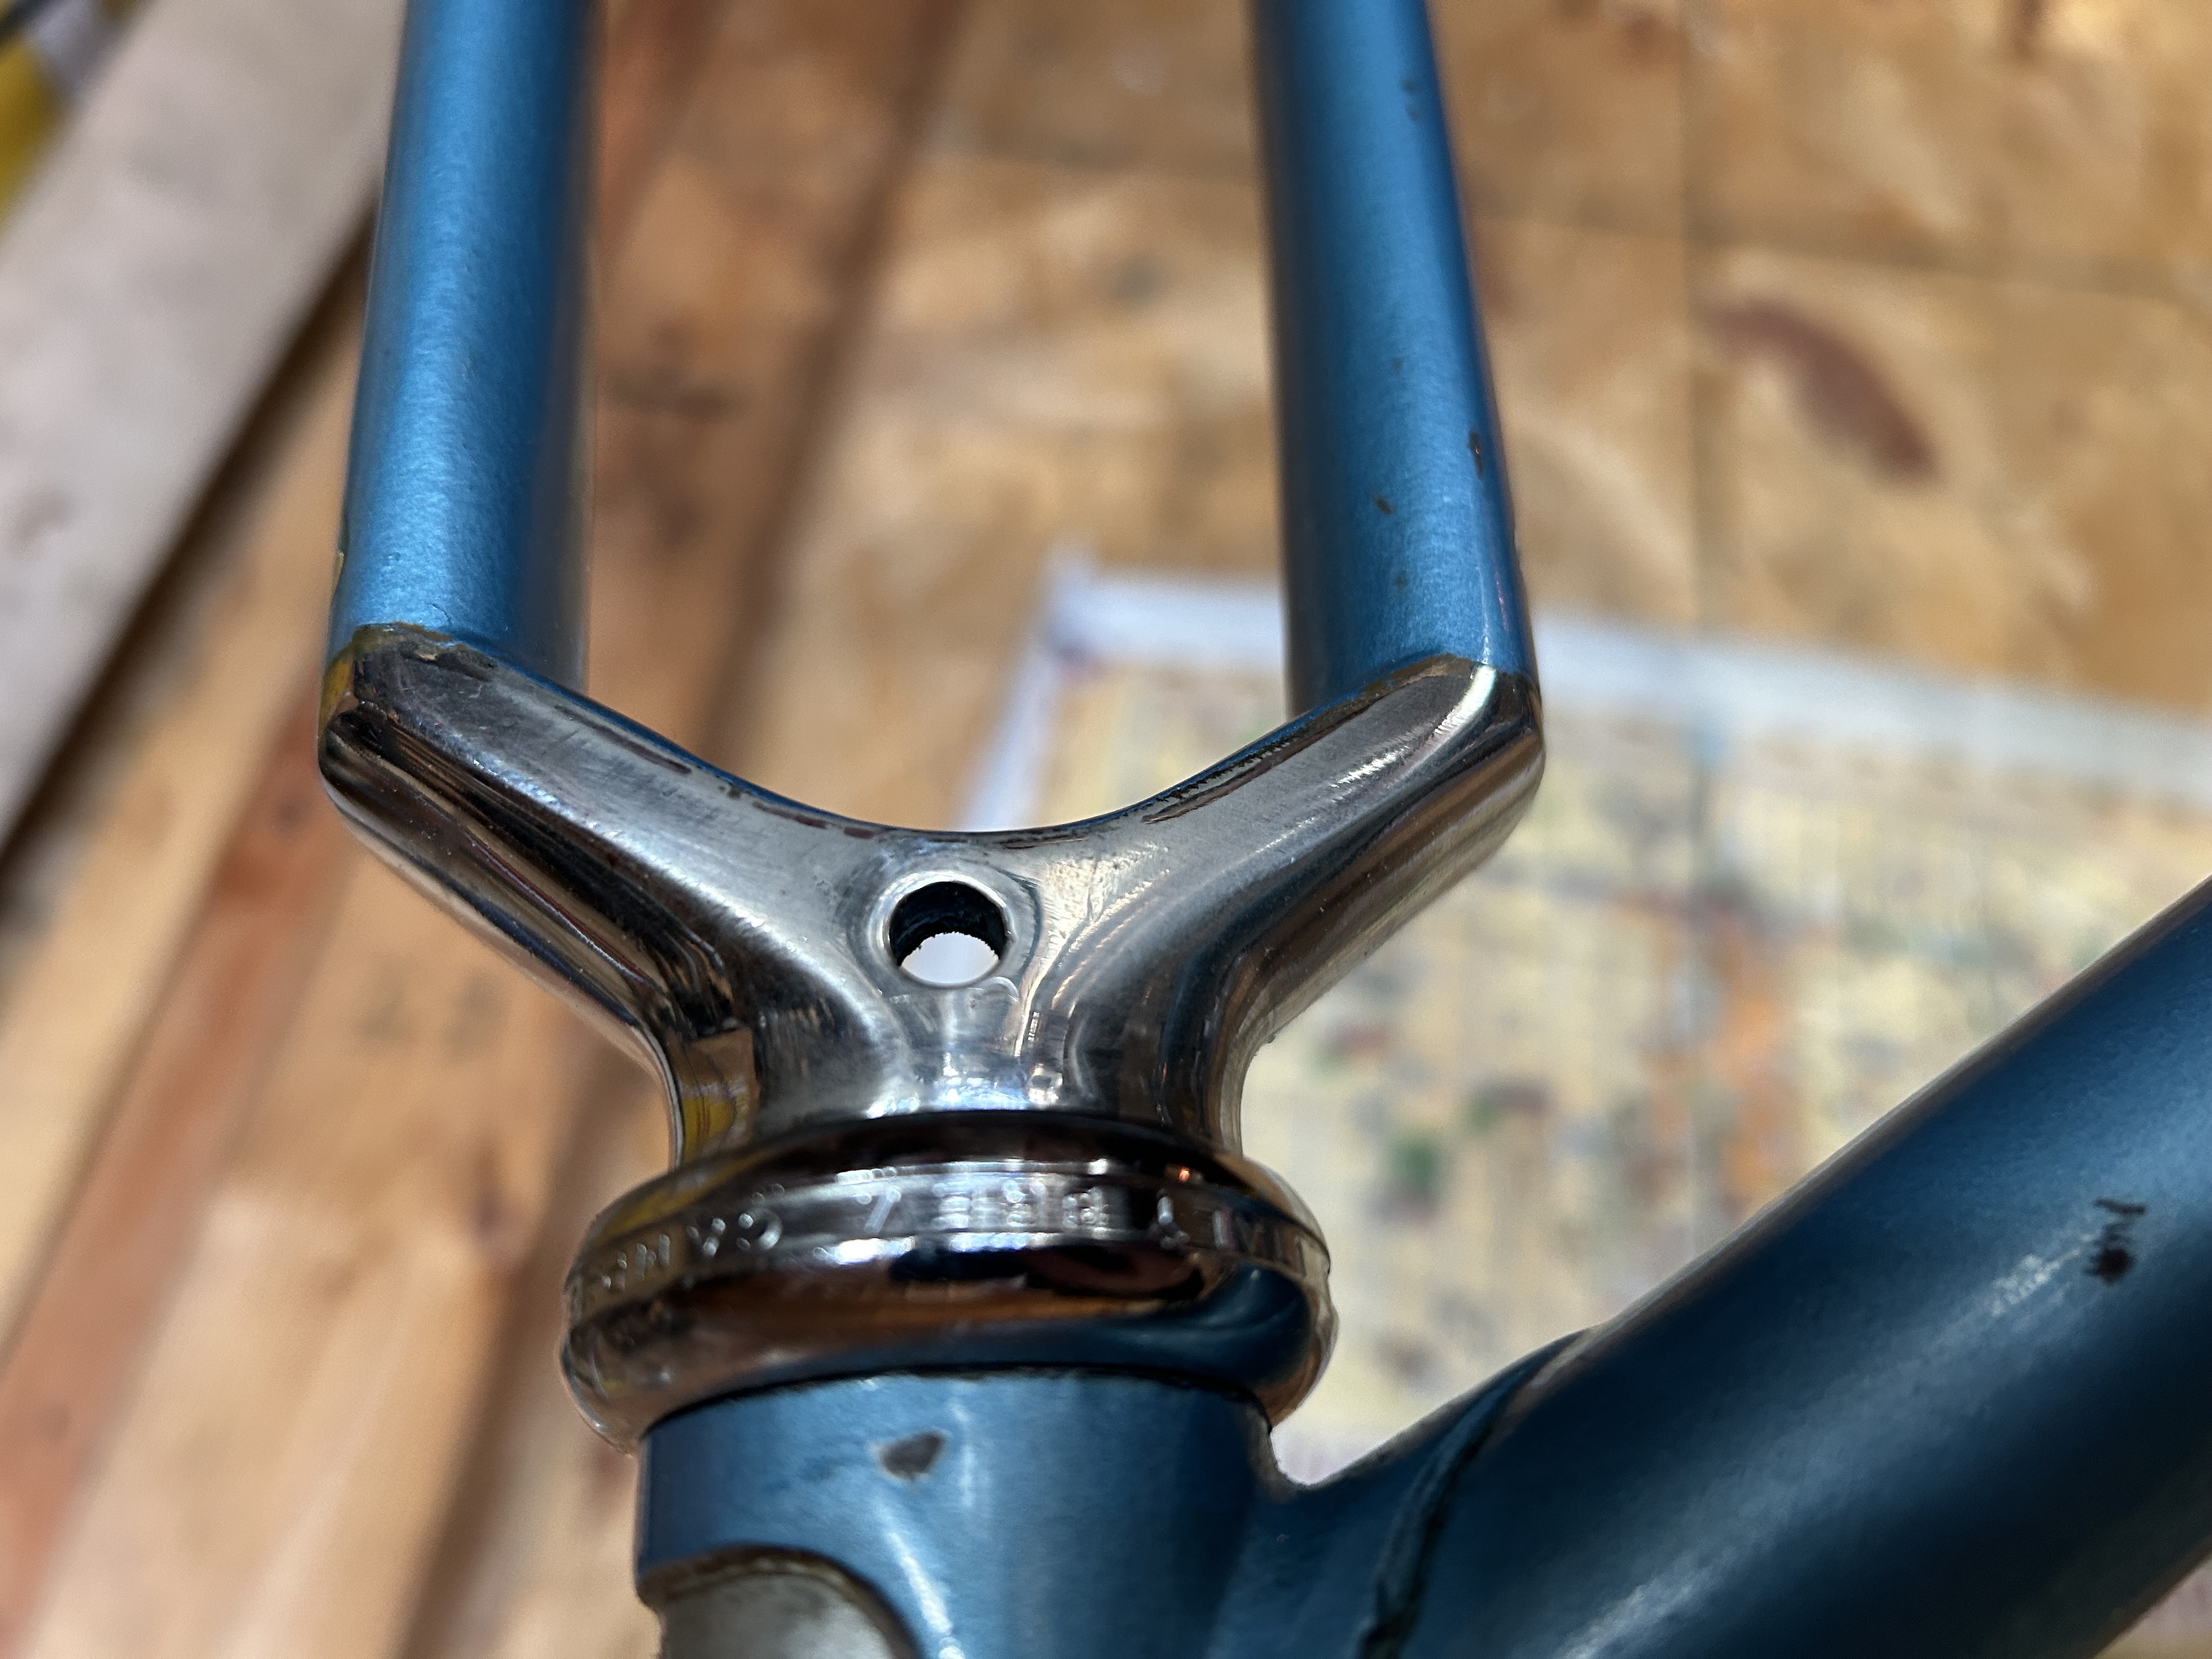
The slender fork crown of a Raleigh Professional
So, in this case, I'll use option #3.
3. Use a 6mm coupler inside the fork crown. This option is a little fidgety but very secure when complete. Start with a 6mm coupler, which should be available at any hardware store. I bought mine from Menards and saved big money ;).
As you can see, the coupler won't fit inside the fork crown without some modification
The coupler I bought was a little too big to fit inside the steerer tube, so I needed to grind it down a bit. Grinding is always fun! Sparks!
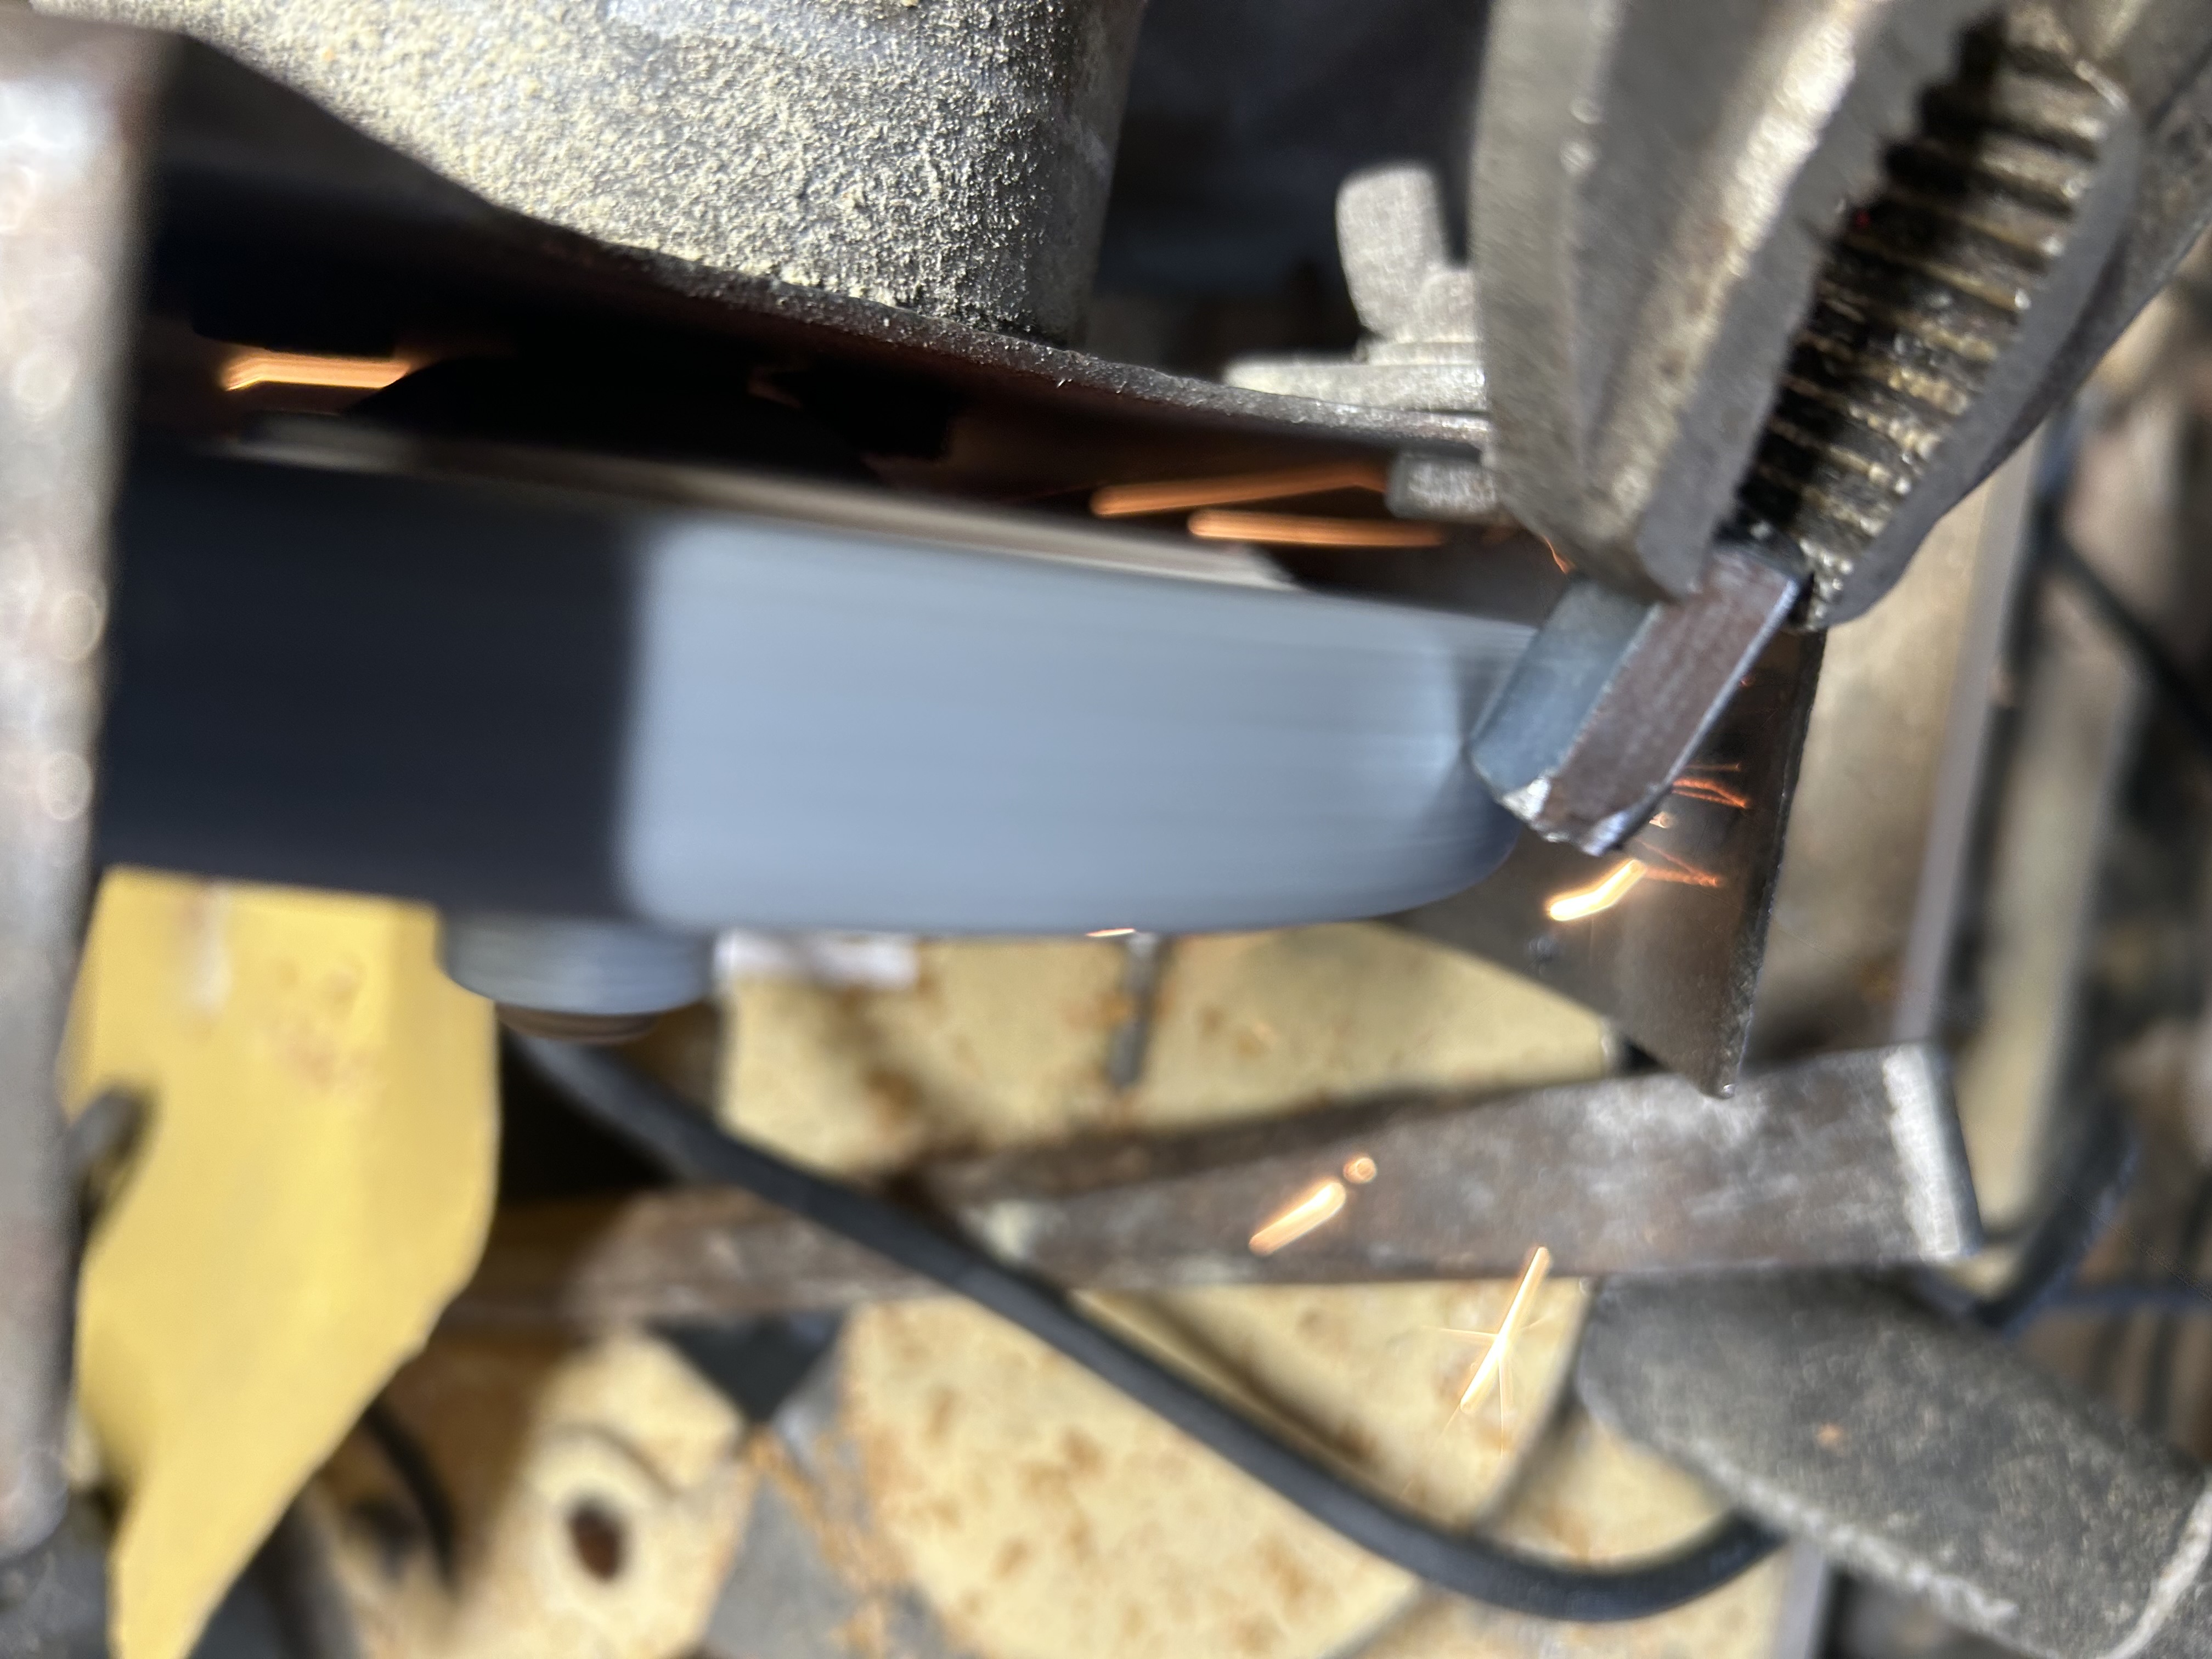
Grinding the coupler
I use a vice grips to hold the coupler while I round off its shoulders so it'll fit. Be careful--it'll be hot when you're done. If you didn't inherit a 60 year old bench grinder from your wife's grandfather as I did, I suppose you could use a bench sander or just a file. Your mileage may vary.
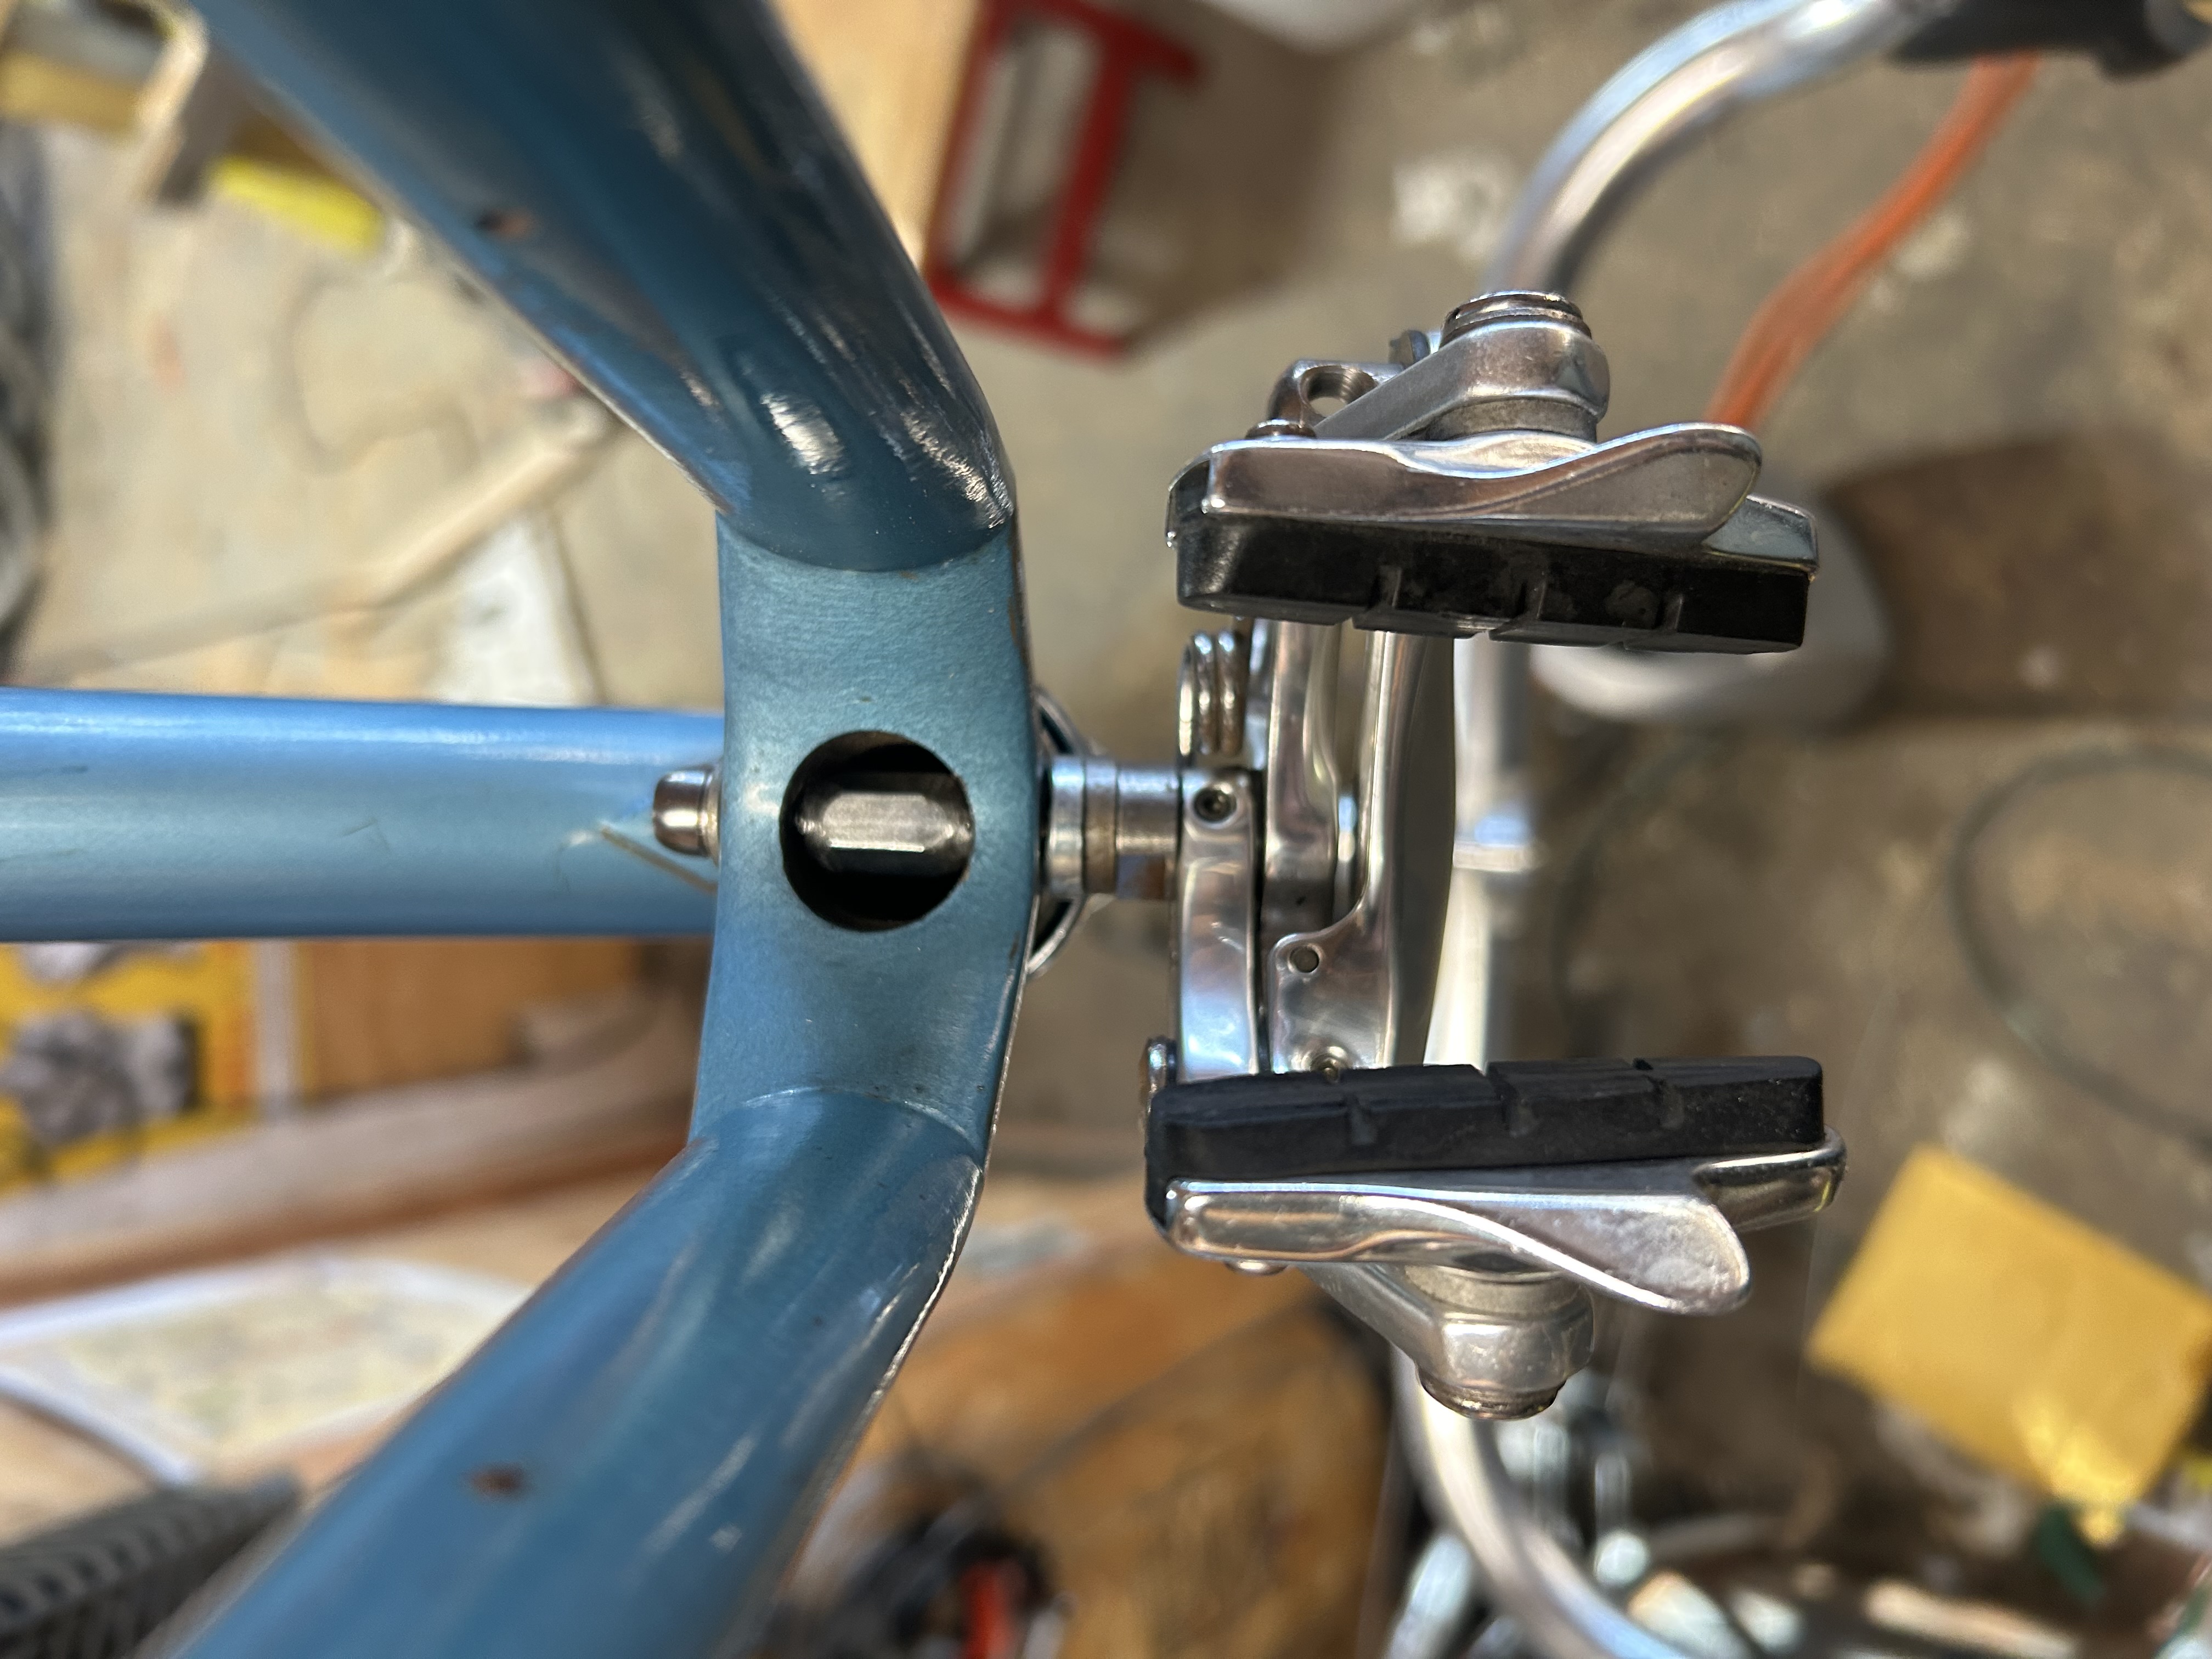
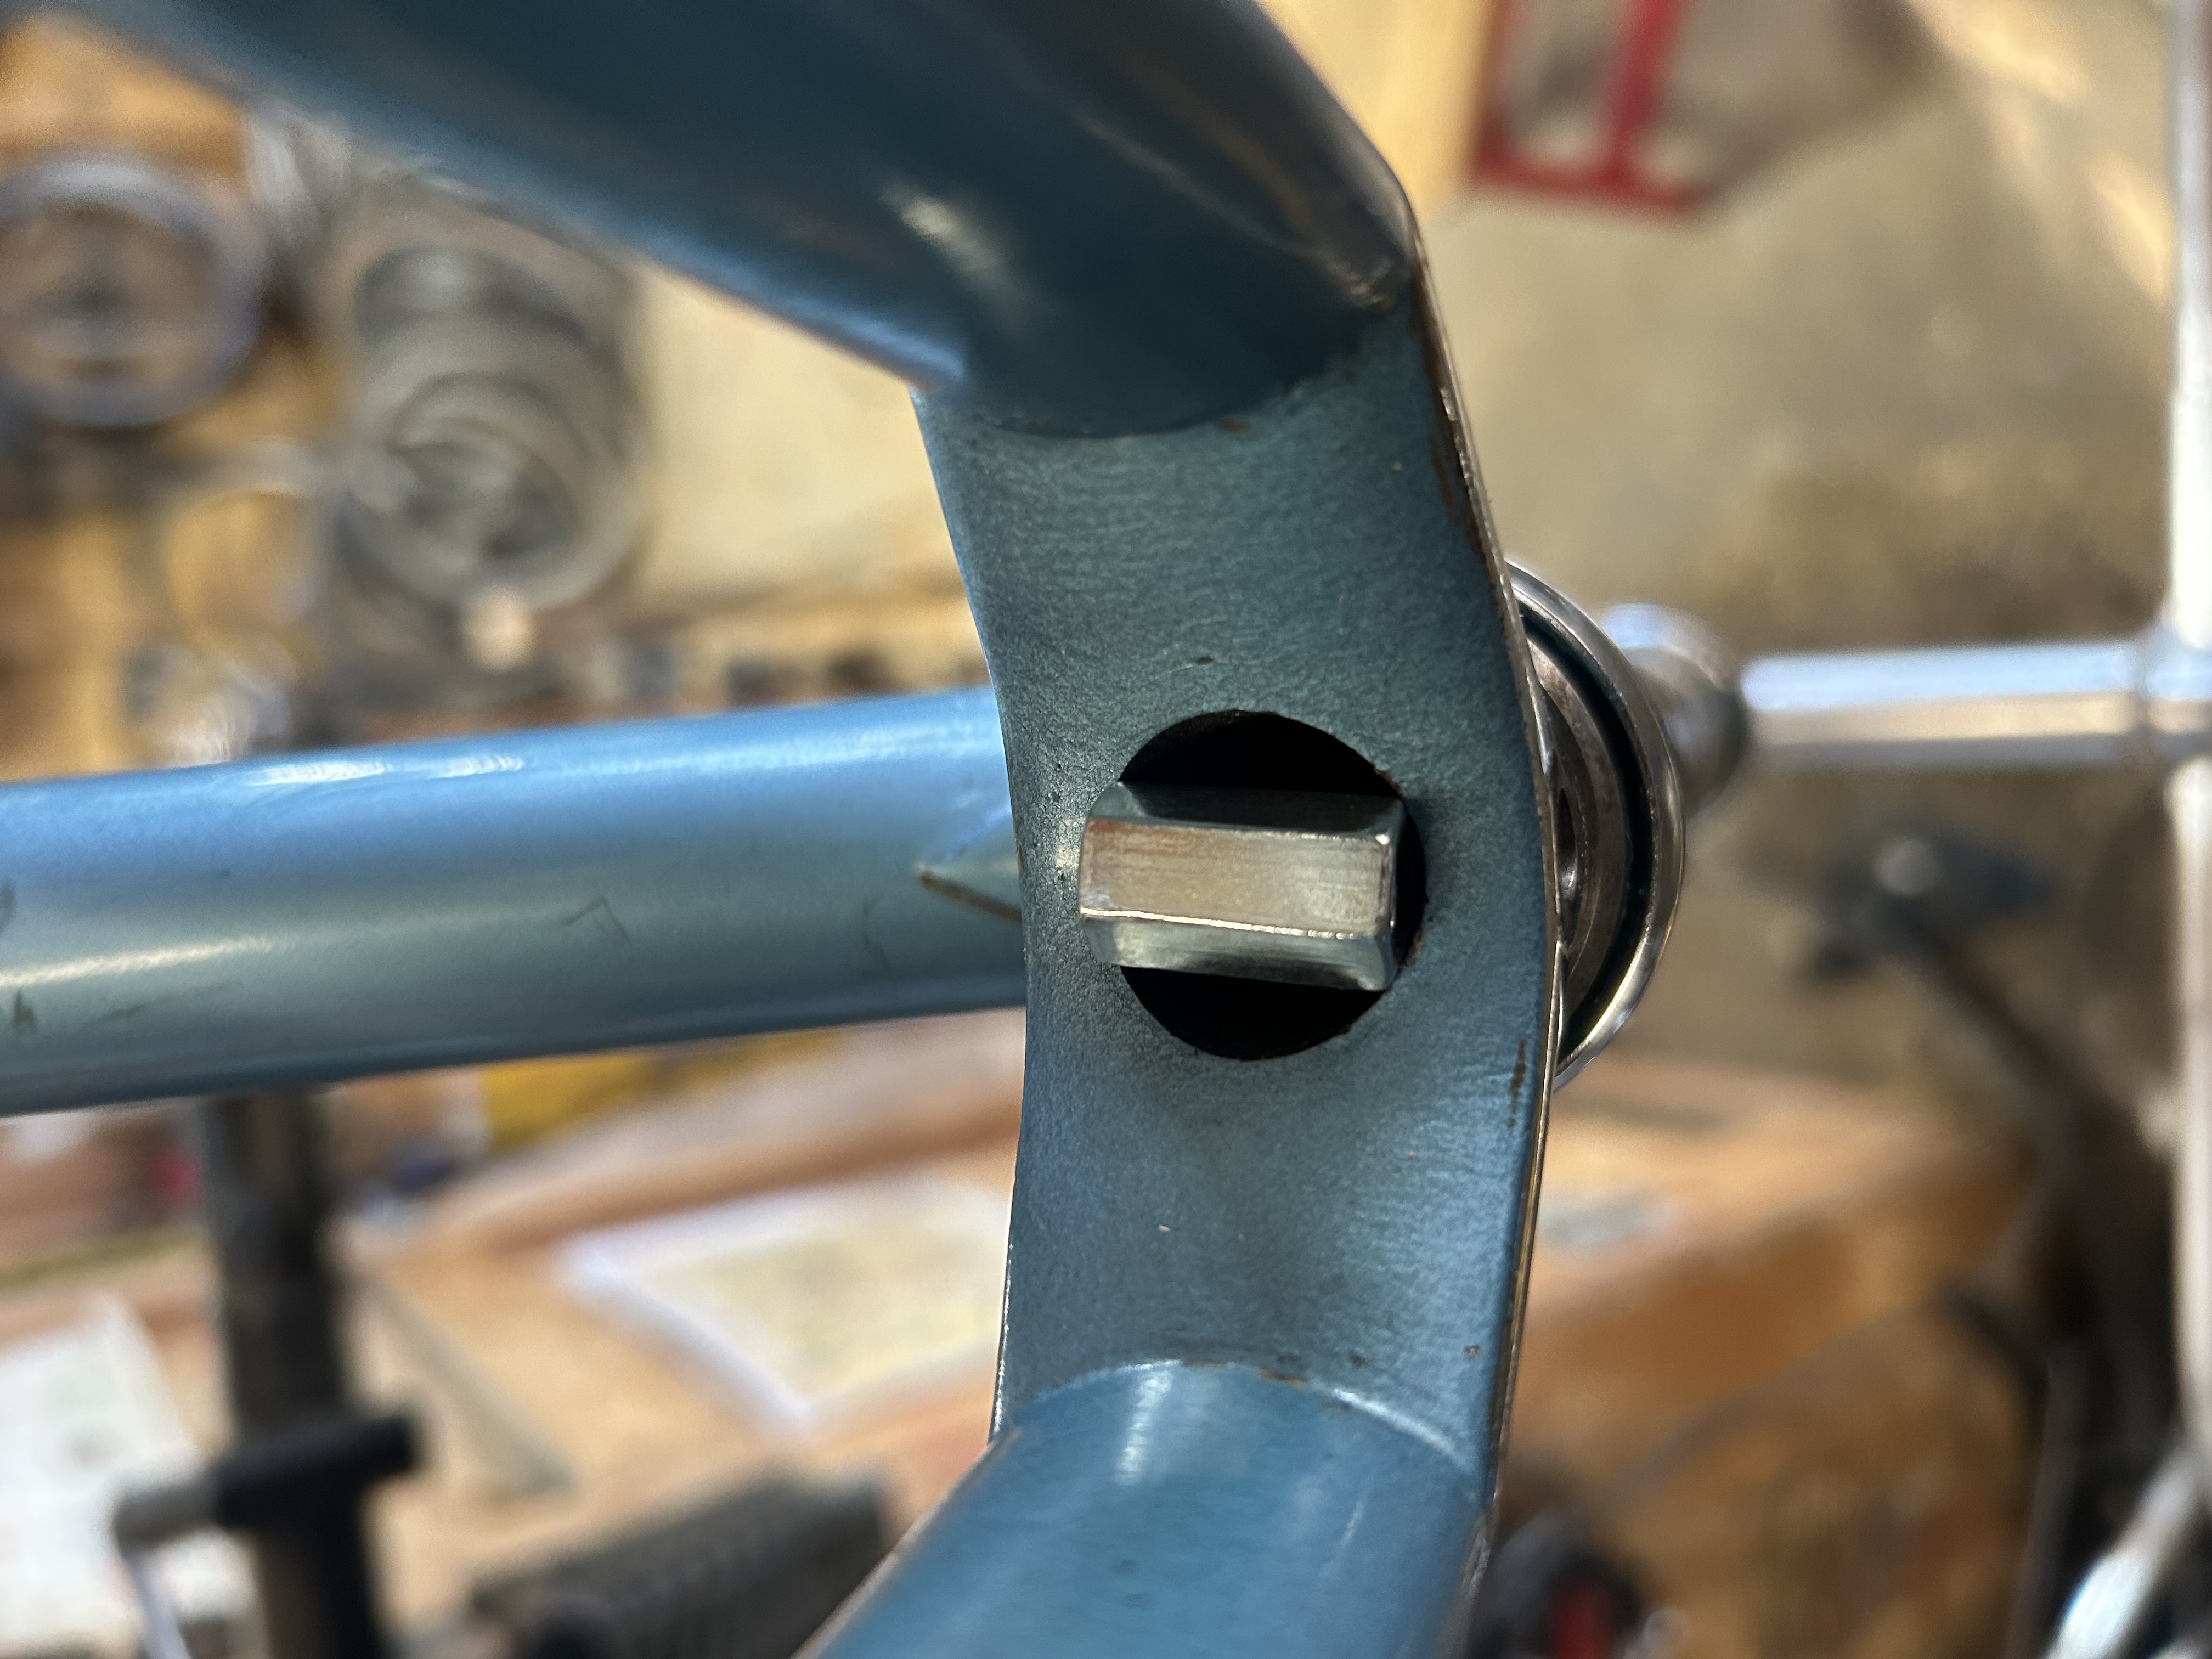
The installed brake
Once the coupler's shaped to fit inside the crown, simply thread the front caliper into it from the front and a small 6mm bolt from the back. Now you've got a strong modern brake on a vintage frame without modifying the frame in any way. Easy Peasey!